Who says that butterflies are the only ones who need these. Not I. I found the cutest pattern from a blog called Tots and Bottoms for a baby cocoon. My good friend Brittney asked one day if I knew how to make them. I had never tried, but the pattern looked simple enough. So I went out, bought the yarn and got working. It took me about 1 1/2 – 2 hours (which is pretty fast) and it turned out ADORABLE! So cute, I might make one for myself with this little nugget that should be here in a few weeks. I’m no photographer (as I’m also no Martha) but it’s fun to add new things to the list.
Saturday, June 25, 2011


Tuesday, June 14, 2011
Crafts for Baby Alana
What have I been up to? Well, everything to put it shortly. However, it hasn’t stopped me from crafting, it’s just stopped me from blogging about it. So here is a quick catch up to what I’ve been up to.
I’ve been so consumed with home, family, etc… and on top of it all I’ve made things for other’s. I realized that I have been neglecting the baby that is inside me and decided to get working!! I started making this little girl headband after headband. I am also working on a blanket and will be doing a hat and booties also. Crafting is my ME time and it’s such a great release to do things creative. Here’s a little taste…
{Alana’s baby blanket. It’s the exact same one I made here. I used a purplish/pink color. I’m about 1/2 way through. It still needs a border and the ribbon, but I think she’s going to like it.}

{These flower headbands were fun to make. I did the satin flowers and then attached elastic bands to the back. Simple and Dainty. The white one is for Alana’s blessing day.}

{These I made from premade fabric flowers that you can get at any craft store and then attached the elastic to the backs again.}


{And these bands I crocheted. The cream one is from super soft yarn. The white and dark pink ones are from crochet thread and turned out so perfectly. I can’t wait to dress this baby’s head!}


{ I just clipped on flowers I had made for Kalea and Mia. It’ll be fun to reuse these over and over in different combinations.}


And onto what I WILL be doing. I’m going to try and make a tutu for the baby. I bought two different kinds of tulle and some ribbon. I found a tutorial on YOUTUBE on how to make one that requires NO SEWING. Which appeals to me, since I don’t own a sewing machine. We’ll see how it turns out. I’ll be sure to post pictures when it’s finished.

BEST BROWNIES EVER!!
These are SERIOUSLY THE BEST BROWNIES I’ve ever tasted. They are simple and fast to prepare. Just as fast as from a box. If you’re ever in need of a chocolate fix, turn to these.
Ingredients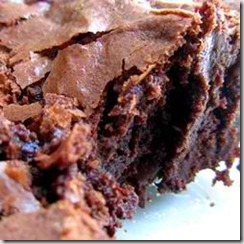

- 1 cup butter, melted
- 3 cups white sugar
- 1 tablespoon vanilla extract
- 4 eggs
- 1 1/2 cups all-purpose flour
- 1 cup unsweetened cocoa powder
- 1 teaspoon salt
- 1 cup semisweet chocolate chips
Directions
- Preheat oven to 350 degrees F (175 degrees C). Lightly grease a 9x13 baking dish.
- Combine the melted butter, sugar, and vanilla in a large bowl. Beat in the eggs, one at a time, mixing well after each, until thoroughly blended.
- Sift together the flour, cocoa powder, and salt. Gradually stir the flour mixture into the chocolate mixture until blended. Stir in the chocolate morsels. Spread the batter evenly into the prepared baking dish.
- Bake in preheated oven until an inserted toothpick comes out clean, 35 to 40 minutes. Remove, and cool pan on wire rack before cutting.
Sunday, May 8, 2011
Freezer Jam
Strawberry season is one of my favorite times of the year. We have a tradition where we go and pick strawberries as a family. A couple of years we went late and they were very picked over. We’ve learned and gone in late April or early May and have gotten the cream of the crop. This year we bought 3 boxes full. We weren’t sure if it would be too much but ended up being just perfect. There were enough to eat and snack on, some to freeze whole for smoothies, and then some for JAM! I have made it a few times with my mom and it’s a day long commitment. However, it’s well worth the work to have freezer jam instead of the store bought kind. Last year I made my own and I ran out. This year I made 9 Tupperware full. I think that should last us. Here’s what I do (it’s just from the recipe in the box and everyone does it a little differently).
Here is what you need:
Strawberries
TONS of Sugar
Pectin – aka – Sure Jell (powder or liquid)
(directions are inside of the package)

1. Clean and Rinse your Strawberries.
2. Cut the stems off of each and place them in a large bowl (or pot).
3. It says in the directions to mash them one cup at a time. I did a MUCH larger amount because I didn’t want to be mashing all day. A potato masher works best but you can use a large fork or whatever you have on hand. When you mash your strawberries it’s ok to have chunks. Jam is SUPPOSED to have chunks of fruit in it.

4. Take your freshly mashed strawberries and measure out 2 cups. Then measure 4 cups of sugar (this may be too much for some… it IS a lot of sugar. Feel free to cut the sugar amount to make it more towards your liking.) Let it sit for 10 minutes, stirring occasionally.
PECTIN
*Depending on the type of pectin this next step may vary. If you use the powdered kind your measure 3/4 cup of water and combine with the pectin to a boil. Stir for a full minute while boiling and then add it to your sugar/strawberry combination.
*Liquid pectin does not require boiling. BUT you WILL NEED LEMON JUICE. It’s 2TBS of Lemon Juice and one liquid package of pectin. Combine. Add to your sugar/strawberry combination.
5. Set your timer for 3 minutes and stir constantly for the next 3 minutes (strawberries, pectin, and sugar combo). I usually taste mine the at the end to see if it’s still grainy. If it feels gritty keep stirring for an extra minute or so.
6. Once finished, pour into air tight containers. I use Tupperware, however, my mother in law saves different containers such as sour cream containers to store them in. Which is smart and cost effective. Either works just fine.
7. Let the jam sit out for 24 hours before freezing. DO NOT SKIP THE STEP.
8. Freeze and enjoy when ready!
Tuesday, May 3, 2011
Finishing Touches
I finished this baby blanket. It wasn’t hard by any means, but it was time consuming. And it turned out a little smaller then I wanted, but it’s for a baby so I was ok with it. Here is the finished project.

Homemade Kettle Corn
DROOOOOLLL… I love this stuff. I wait every year for the NC State Fair to come in October so I can stuff my face full of this stuff. It’s one of my favorites. Well after many many tries, I have perfected popping this delectable snack on my stove… without burning it… which is a challenge in itself. It’s really easy (once you get the hang of it) and TOTALLY worth it. Here’s some step by step instructions. Try it!!

What you’ll need:
- A bag of popcorn kernels – 1/2 cup
- 1/4 oil
- 1/4 sugar
- salt – sprinkle to your hearts desire
Make sure you use a large pot that has a fitted lid.
Take your oil and pour into pot.
Heat your burner to a medium-high heat.
Drop in 3 popcorn kernels.
Put your lid on and listen carefully.

When you hear 3 pops, take off your lid and add in your 1/2 cup of kernels and your sugar and stir around (do all of this quickly). Replace your lid again and lower your heat a little (medium- low). I keep the pan moving back and forth until I hear popping. Once it gets pretty active in there lift your pot every 3 counts, and then lower it on the heat again. Repeat. Sometimes I don’t even put it back on the heat and I just keep my shaking it back and forth in the air. Make sure you have one hand firmly on the lid and use 2 pairs of oven mitts (one for each hand) because the oil may pop out of the lid a little. Once the kernels have stopped popping open your lid and add your salt. I usually just put some in the palm of my hand and sprinkle it (like feeding the chickens). Be sure to stir it so the salt covers evenly. It’s really hot when it first comes out so let it cool (especially for the kids). The darker pieces are where the sugar has caramelized. Sooo Yummy!! Enjoy and don’t get discouraged if it doesn’t come out perfect the first time. Practice makes perfect!

Tuesday, April 12, 2011
HEADBANDS
So I made some headbands for a friends baby shower. These were the EASIEST thing I’ve made so far. All you need is:
Fabric flowers
Elastic
Needle and Thread
Felt
Hot glue gun
You take your elastic and measure the length. I did newborn headbands and it needed 14” of elastic. Cut your elastic. Take your needle and thread and sew your two ends together (it doesn’t have to be perfect). Once your ends are sewn take your felt and cut a small circle (you may need felt on the back of the flower – which means you’d need 2 circles cut out). Hot glue one circle onto the back of the flower (if needed) then take your elastic (where the end is sewn because it doesn’t look very pretty) and hot glue it between both felt circles. Wahlah! You’re done! Super easy, cute, and dainty!


I forgot to mention… You can buy fabric flowers at any craft store in their scrapbooking isles. I bought these ones at Michaels. Also, you CAN dye your elastic to match if you’d like. I’ve never done it, but try and out and let me know how it goes!!
**Thanks to Suzanne for the cute baby pictures.**
Here are the other lengths if you want to make some for older girls:
Newborn: 13 1/4”
3-6 Months: 14 1/2”
6-12 months: 16”
12 Months-Teen: 17 1/2”
Adult: 18”
Subscribe to:
Posts (Atom)