Stewart, that is. I thought I’d start a new blog full of recipes, crafts, and just stuff I’m interested in or have found useful. I’m not the craftiest person. I’m not the best cook. But I do have lots to say and now you all can partake. But let’s face it, I’m no Martha.

Thursday, March 17, 2011

RETIRING

Well, not forever, but for the season. Winter has pretty much come and gone in our neck of the woods. I was SO busy and SO thankful for everyone who like my stuff enough to buy something from me. But don’t fret, I’ll be be back next fall and winter. And I think I’ll stock up and make a bunch throughout the summer to keep me caught up. I’ve been very blessed with all of you supporting me and even giving me suggestions and ideas throughout.

I am going to keep making things, mostly gifts. Baby blankets, booties, etc. I made this for a good friend. It turned out so cute that I’ll probably make one for our little girl… eventually.

**I think the brown ribbon around the edging really makes it. Other ideas I thought of  was skipping the ribbon and maybe putting a cluster of flowers in a corner.**

IMG_0176IMG_0177

GIANT BIRTHDAY COOKIE

This thing turned out to be a HUGE pain at first… There are a few things I would have done differently. To start… You can use whatever size pizza sheet you want. I happened to buy a 13” pan… a 16” pan would be perfect, in my opinion. It would have been just fine but I made a bunch of mistakes. Learn from them.

1. Make sure you have enough room on the edges for expanding. It WILL drip over and burn at the bottom of the oven. I would give yourself 1-2” at least. I ended up taking out 2 1/2 cups of the dough. Which is GREAT because then you have it on hand to make regular cookies later on.

2.If you’re super worried about spilling over then put another LARGE cookie sheet underneath. Problem solved. I learned this he hard way. Mine spilled over, set my oven on fire (after getting the cookie out in time), and filled my house with smoke. It was a learning experience, to say the least. But you know what?? The cookie was REALLY good and everyone ate it up.

3. After it completely cools decorate however you see fit. It happened to be my daughter’s 5th birthday, so I piped some frosting and WAHLAH!

IMG_0103

Ingredients
  • 1 cup butter, softened
  • 3/4 cup white sugar
  • 3/4 cup packed brown sugar
  • 1 1/2 teaspoon vanilla extract
  • 2 eggs
  • 2 cups all-purpose flour
  • 1/2 teaspoon salt
  • 1 teaspoon baking soda
  • 2 cups semisweet chocolate chips
  • 1 cup chopped walnuts (optional)
Directions
  1. In large bowl, beat butter, granulated sugar, brown sugar, and vanilla until light and fluffy. Add eggs, one at a time, beating well.
  2. Gradually add flour, salt, and baking soda, beating until well blended. Stir in chocolate chips and nuts.
  3. Spread in greased 14 inch round pizza pan. Bake at 375 degrees F (190 degrees C) for 20-25 minutes. Cool cookie in pan on a cooling rack. Decorate as desired.


Friday, February 18, 2011

CROCHETING


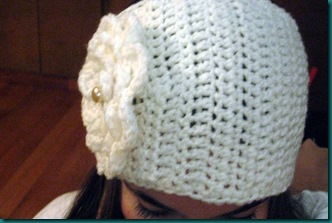
… HAS TAKEN OVER MY LIFE. It’s what I’ve been doing most of winter and finally decided to start selling my stuff. Mostly to people I know. People have suggested Etsy.  I haven’t opted to do that yet… it kind of freaks me out. What if people complain and I get irritated. Plus, I’ve been so busy as it is, It just doesn’t seem feasible right now.  Here are a few things I’ve made and sold.

earwarmer

Thursday, February 17, 2011

ONE MONTH LATER…

I’MMMMM BAAAAACK. We’ve been REALLY busy around here with all of the house preparations. To bring you up to speed… We are selling our house (or at least going to try to) starting in March. I’ve made it a goal to get the girl’s room to actually LOOK like a girl’s room. So after finally finding an inexpensive ( but cute bedspread) we needed to amp up some of their already established decorations in their room. We had a long shelf that needed to be repainted and hung up. So we painted it a pepto bismal pink (that’s the best way to describe it) and then I needed something on top…

Which brings me to my latest project. It took a couple of weeks to finish. Between sick kids, dinners, cleaning, preschool classes, and regular everyday life I finally finished. My bff Lisa Larson helped me (and pretty much held my hand) throughout the whole thing.  Here’s what we did…

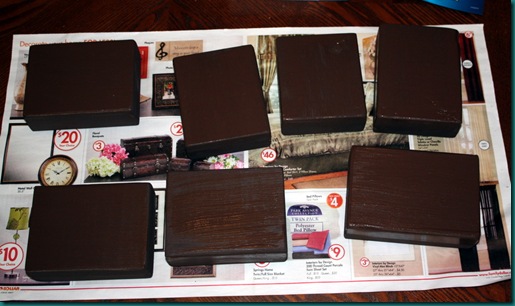
Lisa had a long piece of wood that was about 2 inches thick. We had it cut into pieces 4”, 4 1/2”, and 5” tall. Afterwards, we (Lisa) sanded the blocks for a smooth surface. We both chose our paint colors. I chose a dark chocolate color while Lisa’s was an off white… how appropriate. 
IMG_0032

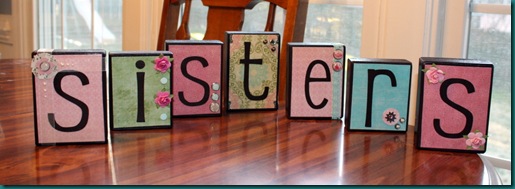
After painting both sides and letting them dry we cut our pieces of scrap paper to fit the front of the paper. We liked a little bit of the brown to show around the front, so the paper was a little bit shorter. We used scrap paper, embellishments, and ribbon from Archivers.  With the scrap paper we Mod Podged the paper and let it dry. Then Lisa happened to have a Cricket which are wicked expensive… I want one. But I’m not holding my breath. We cut out our letters. Mine spelled out “SISTERS” and Lisa’s spelled out “SWEET GIRL”. Then we Mod Podged those on also. After everything dried, we Mod Podged the whole darn thing (we LOOOOVE some Mod Podge… It acts a glue, sealant, and adds a glossy finish. Ok… So time for some embellishments. This was kind of the hardest part. You wanted to incorporate all of your colors, plus you didn’t want to repeat yourself in your patterns. After finally finding the PERFECT combination… Here’s how it turned out.
IMG_0062 

Here’s an up close look to some of the letters…

 IMG_0059
IMG_0060 IMG_0061

I’m REALLY pleased with how they turned out. If I didn’t have Lisa to help me, they would have turned out TERRIBLE!! When I got home I immediately put them up and of course stared adoringly.

And then took too many pictures.

IMG_0070 IMG_0064

Monday, January 3, 2011

Headband Earwarmer

thkhdbndbrn-2_original

So my Sis-In-Law, Candice, has this headband/earwarmer/headwrap that she bought while up in New York. It’s really cute and LOOKED like something I could make.  The only problem is that it was KNIT… and I don’t knit. So I started searching online and found this and thought to myself, “I can make that.” I didn’t have a pattern though. They are pretty popular right now (especially out West) so people aren’t really giving away their patterns.

So I attempted it and here is how it turned out.

 IMG_0545 IMG_0546

IMG_0547

 IMG_0549 IMG_0550

I’m pretty happy with how it turned out… especially since it was my first attempt on making something without a pattern. I think next time I would make it with a bulkier yarn and maybe a few alterations here and there. But overall I think it turned out ok. So many possibilities.

Now… I have a question for you. Would you buy this? I have NO idea how much I would sell it for but it was really fun to make and I would it do it in so many different colors.  So please give me your input or any advice you may have on ways I can make it better.  Thanks for stalking me.

Kristy

Thursday, December 16, 2010

Coconut Shrimp

If you’re needing a little something Tropical in your life… especially with all of this freezing cold weather… THESE are to DIE FOR!! I made these last night for dinner and we SCARFED them up. They can be a little tedious but well worth all the effort. They tasted better then any coconut shrimp I’ve found at a restaurant.


17753

Ingredients
  • 1 egg
  • 1/2 cup all-purpose flour
  • 2/3 cup  chicken broth
  • 1 1/2 teaspoons baking powder
  • 1/4 cup all-purpose flour
  • 2 cups flaked coconut
  • 24 shrimp
  • 3 cups oil for frying
Directions
  1. In medium bowl, combine egg, 1/2 cup flour, beer and baking powder. Place 1/4 cup flour and coconut in two separate bowls.
  2. Hold shrimp by tail, and dredge in flour, shaking off excess flour. Dip in egg/beer batter; allow excess to drip off. Roll shrimp in coconut, and place on a baking sheet lined with wax paper. Refrigerate for 30 minutes. Meanwhile, heat oil to 350 degrees F (175 degrees C) in a deep-fryer.
  3. Fry shrimp in batches: cook, turning once, for 2 to 3 minutes, or until golden brown. Using tongs, remove shrimp to paper towels to drain. Serve warm with your favorite dipping sauce.
*Originally the recipe called for beer but I changed it chicken broth because we NEVER have beer on hand. Go figure. But I didn’t have either last night. So I used 1/3 cup water and 1/3 cup milk to make my batter. They turned out so good!*
* The other thing I added was a little more spice. Cayenne pepper, Garlic Powder and some salt. Make sure you used sweetened coconut flakes so you have the sweetness you’re looking for. Enjoy!!*

*After I dipped the shrimp in the batter and the coconut mixture I put the shrimp in the freezer for 15 minutes.*

Found at www.allrecipes.com

Sugar Coated Pecans

The past couple of years Christian’s mom has given us a big bag of pecans. This year we made a family night of cracking and shelling them. So I had this HUGE bowl of pecans that I wasn’t sure what to do with. I found this recipe and it got 5 stars and over 1,000 reviews. So I knew I couldn’t go wrong. The second thing I did was read all the reviews and see what changes were made. I’ve incorporated those changes into this recipe. I have them baking in my oven as we speak. It just snowed (again!) so it’s a perfect day to stay home and make a special treat.

403891

Recipe Yield 1 pound

Ingredients
  • 2 egg whites
  • 1 tsp vanilla
  • 2 tsp water 
  • 1 pound pecan halves
  • 1 cup white sugar
  • 3/4 teaspoon salt
  • 1/2 teaspoon ground cinnamon
Directions
  1. Preheat oven to 250 degrees F (120 degrees C). Grease one baking sheet.
  2. In a mixing bowl, whip together the egg white and water until frothy. In a separate bowl, mix together sugar, salt, and cinnamon.
  3. Add pecans to egg whites, stir to coat the nuts evenly. Remove the nuts, and toss them in the sugar mixture until coated. Spread the nuts out on the prepared baking sheet.
  4. Bake at 250 degrees F (120 degrees C) for 1 hour. Stir every 15 minutes.

*A couple of other things. I increased the cinnamon just a little bit. And ALSO… I used gallon sized zip lock bags instead of bowls to do the mixing. It made it really fast to coat evenly and clean up was a cinch!*

Found at www.allrecipes.com